CT90/CL90/S90 Suspension

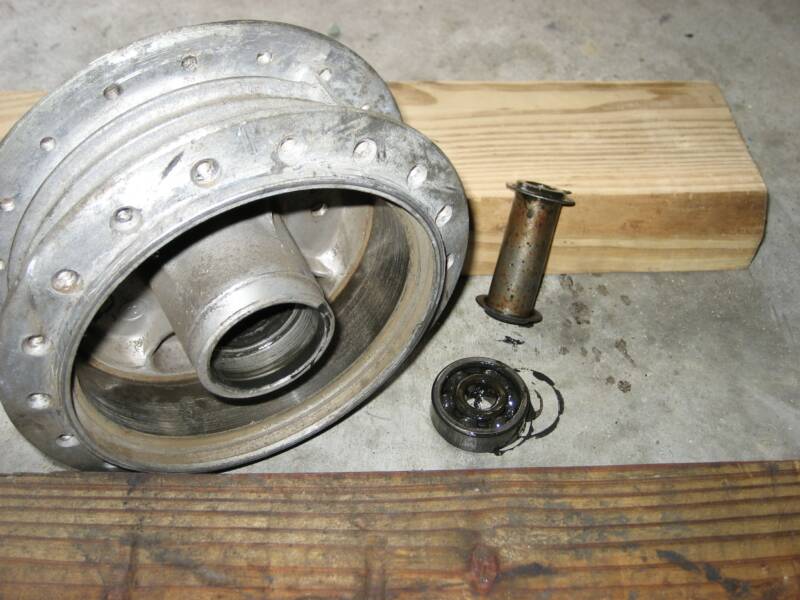
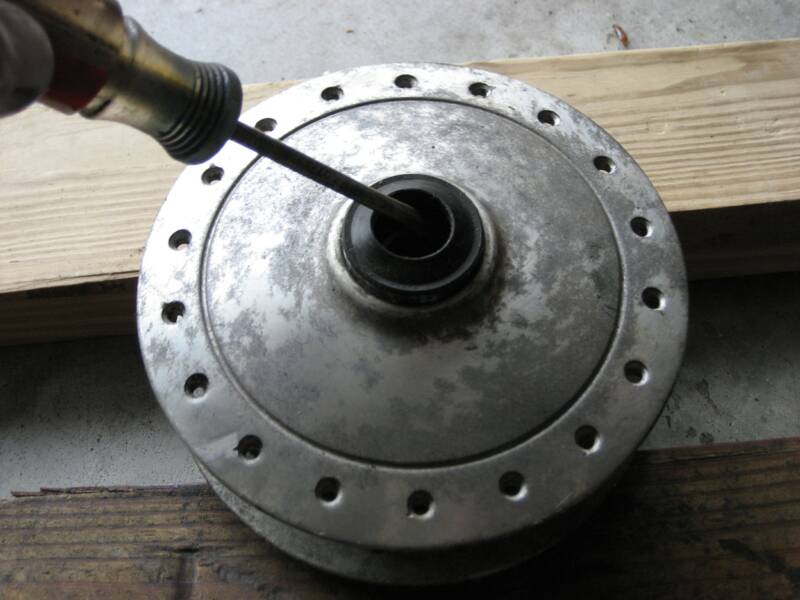
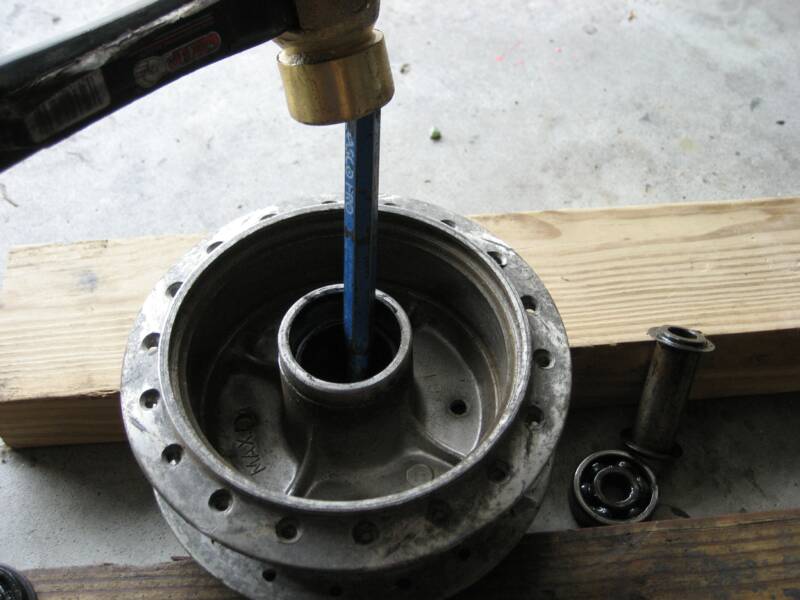
Use a propane torch to heat the inside of the hub. Don't overheat, just need a little bit of heat to loosen things up. Tap the hub between two pieces of wood and the bearing should come out of the hub. The opposite side bearing can be removed by using a punch. Make sure to take the seals out and save them for future reference when you are ready to install new seals. Make sure the hubs are within specs. (111mm max diameter) before you clean and polish them. The hubs had clear coating from the factory. The coating has to be removed before the hubs can be polished. You can use any number of methods to remove the old clear coat.
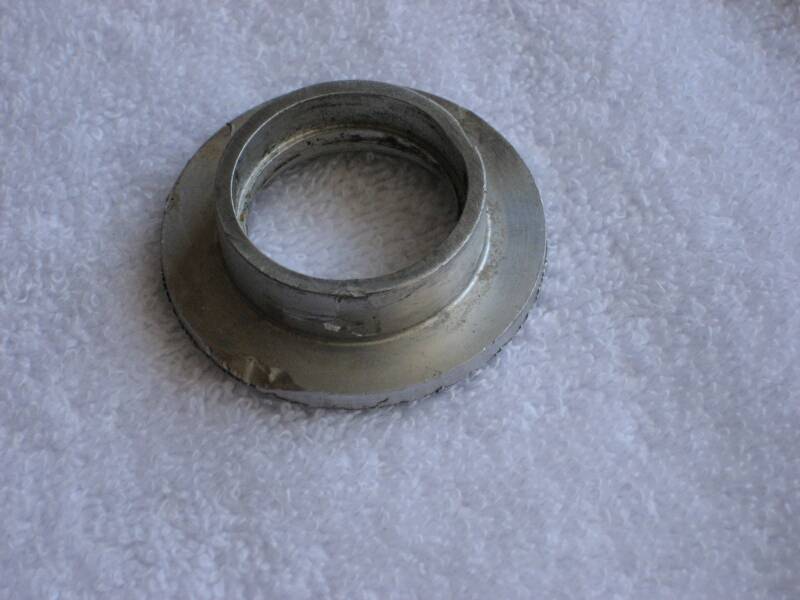
CT90 Brake Hubs
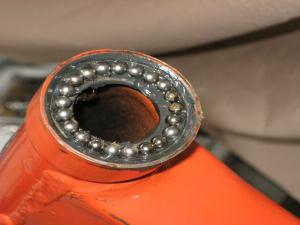
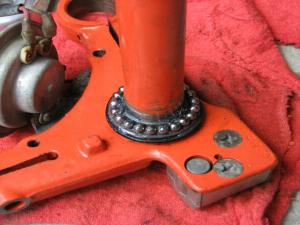
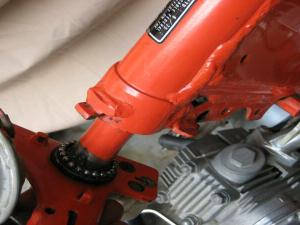
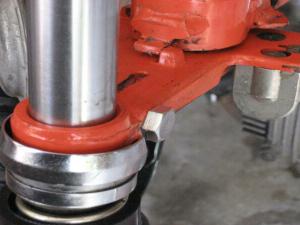
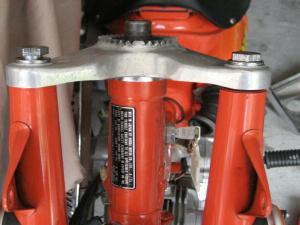
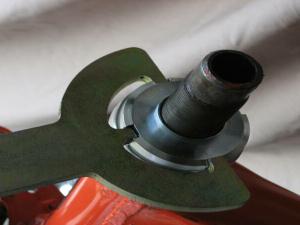
CT90 Triple Tree
Although the procedure below describes the head tube ball bearing installation on a CT90, the same races and ball bearings are used on many models of Honda motorcycles of the 60's, 70's and the 80's.
This procedure will be needed whenever you need to replace the front fork seals or boots. The fork seal replacement process can be found in this section.
After you disassemble the triple tree, clean and dry the balls. Almost all the Honda from that era use a total of 42 balls, 21each for top and bottom. Before reassembly, clean all the bearing surfaces with acetone and remove all the old grease and grime. Use grease on the top and bottom races and place the balls on the races. The grease will hold them in place.
Don't forget to grease the bottom race in the neck. Gently slide the triple tree through the neck.
Make sure the top and bottom balls are in place. Slide the clean and greased top race in position.
Screw on the top nut and tighten it using the special nut wrench. Tighten until the triple tree is hard to move. The tightening is to make sure all the balls are seated in the races. Loosen the nut about 1/4 to 1/2 turn, until the triple tree is very easy to move. With proper adjustment, you should be able to move the triple tree with a slight touch. Use a long bolt to draw the fork tube up towards the top mount.
Once the fork tube is almost to the top, just under the top mount, tighten the pinch bolt. Repeat the procedure for the other side. After you have both fork tubes almost to the top, remove the top mount and slide the tube covers/headlight mounts on the fork tubes. Place the top mount into position and screw in the fork bolts partially. Loosen the pinch bolts, place the headlight bucket in position and then tighten the fork top bolts completely. Don't forget to re tighten the pinch bolts after everything is in position.
1
2
3
4
5
6
7
8
9
10
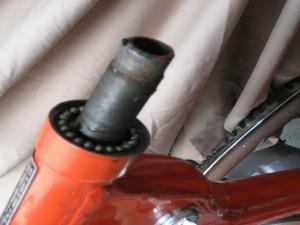
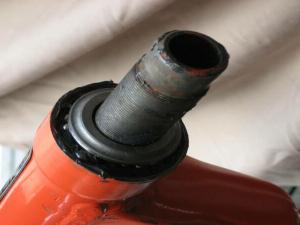
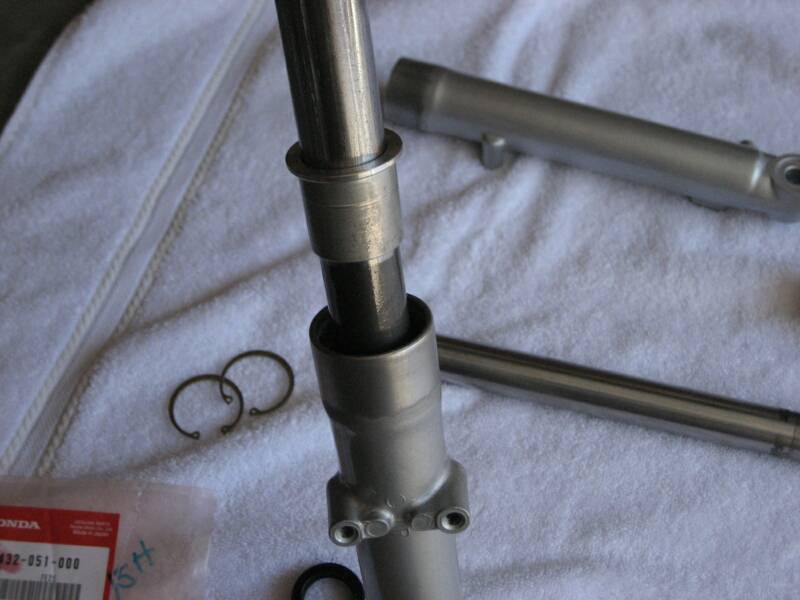
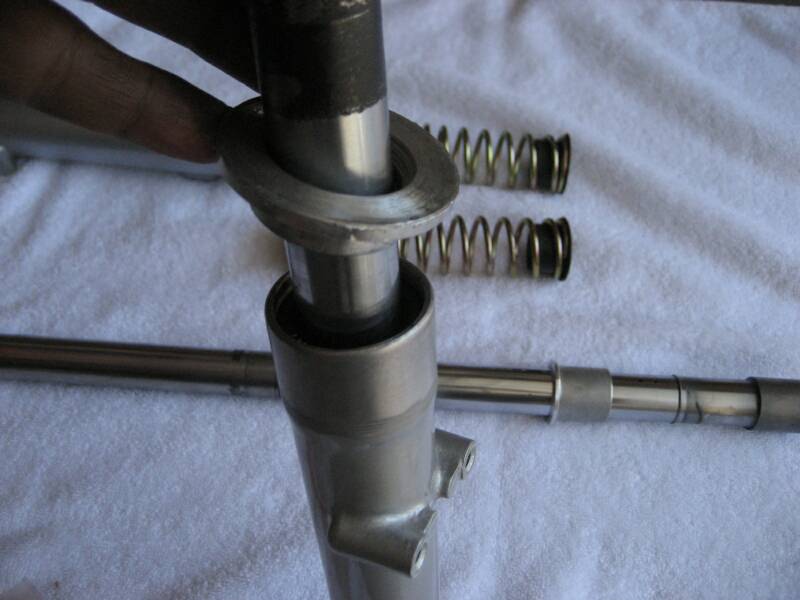
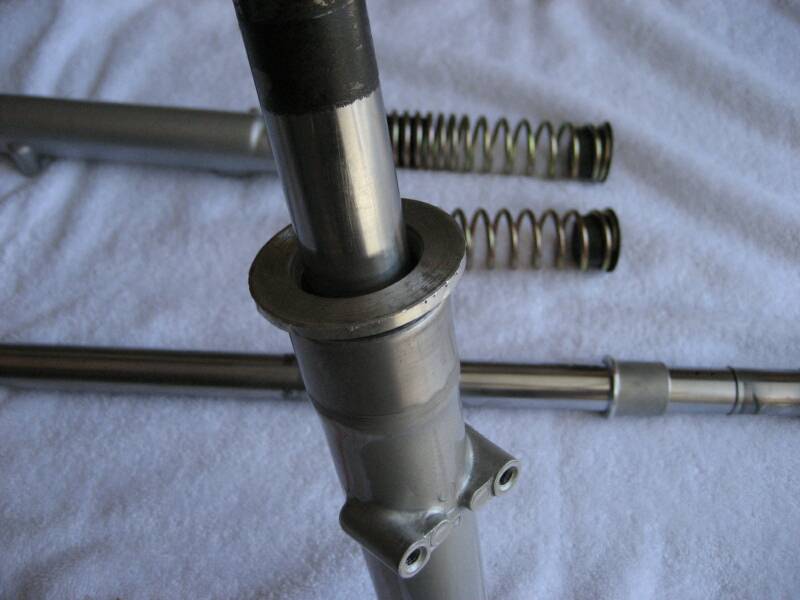
CT90, ST90, CL90, S90, CT70 Fork Seals
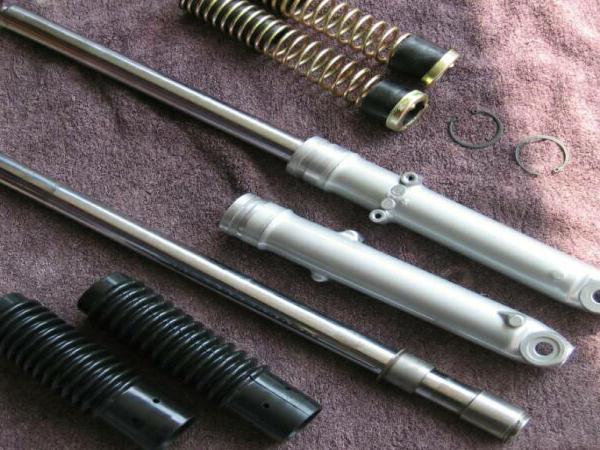
The procedure below describes the Front Fork Seal replacement. The pictures show the forks for a CT90. The same setup is used on many of the Honda motorcycles of the 60's, 70's and the 80's.
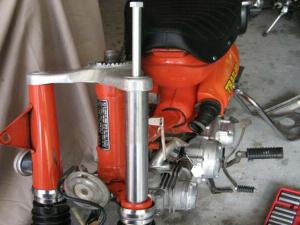
Complete Front Fork Setup for CT90
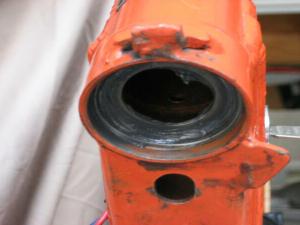
CT90/CL90 Rear Shock Disassembly
The early CT90 and CL90 Rear Shocks are almost identical. One major difference is the CL90 Shocks are much wider than the CT90.
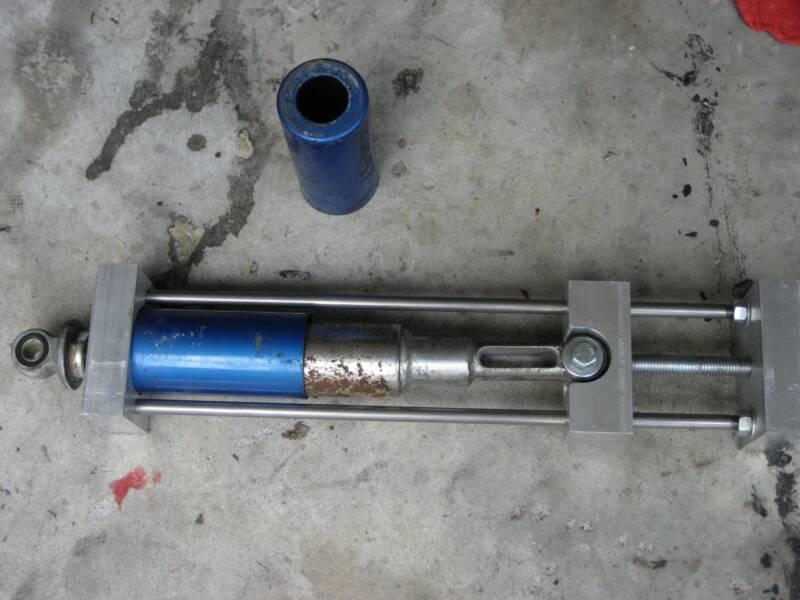

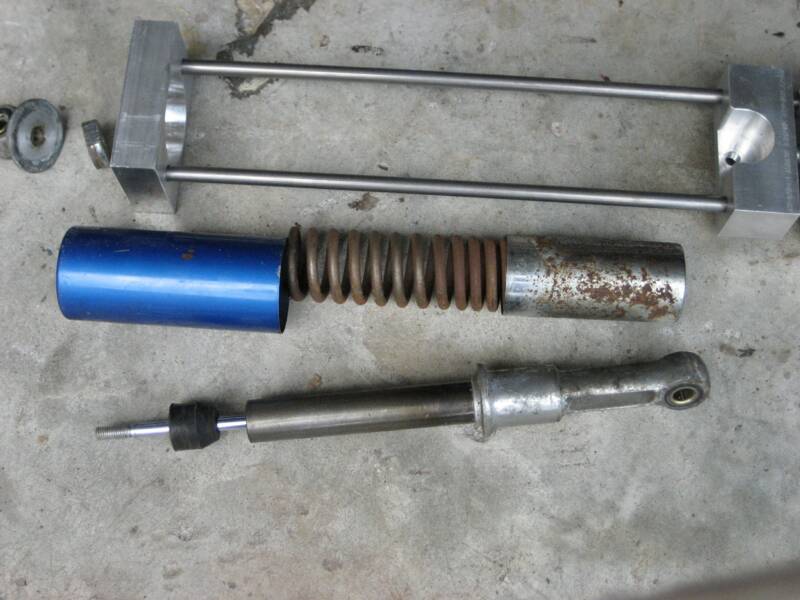
The only safe way, I know to dismantle the shocks is to use a shock compressor like the one pictured. The shock is mounted with the lower mount hole to the shock compressor and slowly tighten. Tightening the compressor exposes the shock top mount and the lock nut underneath the mount.
You have to hold the lock nut with a wrench and use a big screwdriver to loosen the top shock mount. After removing the lock nut, shock compressor can be loosened and all the shock components can be taken apart for refurbishment.
The first picture shows a seal driver I made using aluminum bar stock. You can fashion a similar tool with PVC pipe of even hardwood.
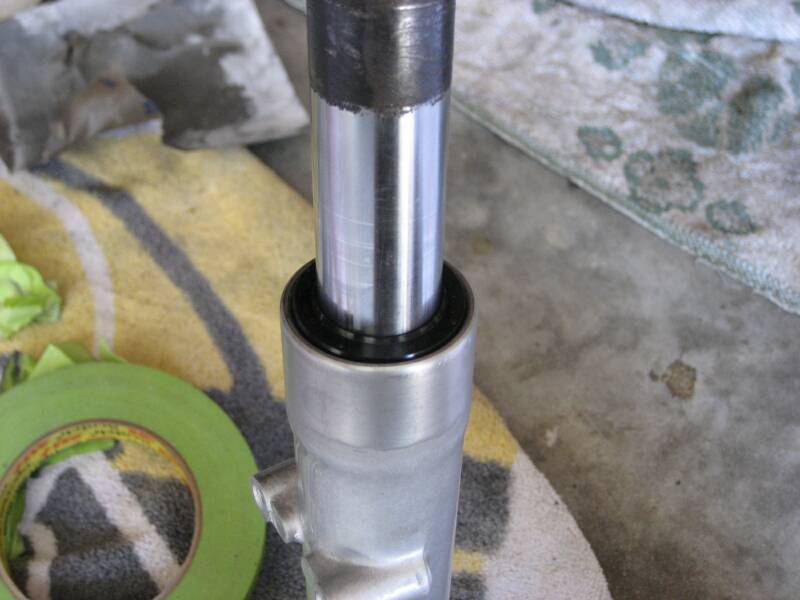
Lubricate the fork piston with some fork oil or transmission fluid and slide it into the fork leg.
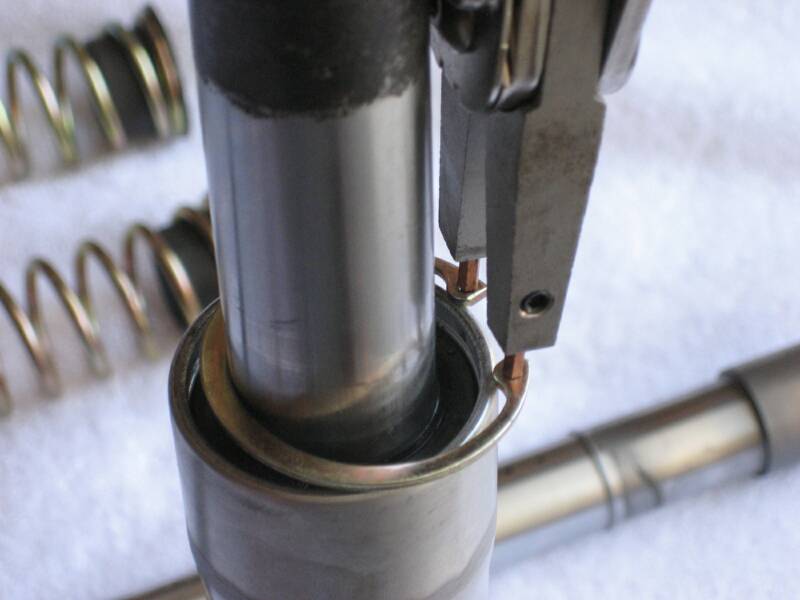
Slide the fork seal on the shaft and seat it using the tool and a hammer as shown in the picture.
Using a Circlip pliers, seat the C Clip into the groove and you are done!
Caution: The C Clip has a sharp edge and a semi rounded edge, the sharp edge faces upwards.
Don't forget to service the fork with proper oil before riding.